This article offers a comprehensive overview of all the features available on your dashboard. Please note that we do not have the My Class or Upgrade and +Pro Account functionality enabled for the Bristol Blogs network.
Themes control the design of your site, including the overall colours, font, and layout.
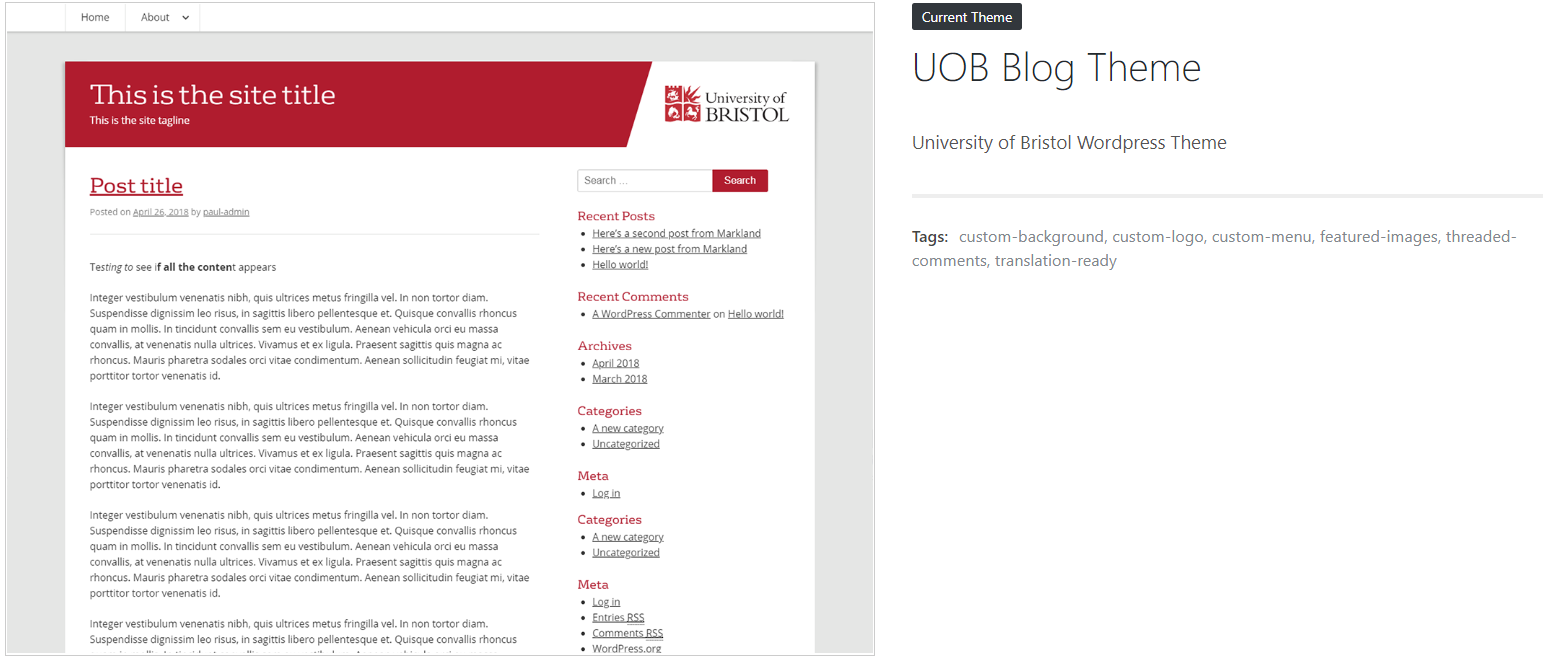
On the University of Bristol Blogs network, the default theme is the ‘UOB Blog Theme’.
Customise the University of Bristol theme
You can customise the ‘UOB Blog Theme’ in a number of ways.
To do this, log into your site and from the Dashboard:
Navigate to Appearance > Customise in the left-hand navigation menu.
Site identity: change the site title and tagline.
Static front page: choose whether your homepage displays a listing of your latest blog posts, or select a static page of your choosing.
Header image: the header image sits as a banner across the top of your site, appearing on every page. You can add a new image or replace an existing image. Choose a high-resolution, landscape-oriented image that relates to the subject matter of your site. The image size must to be 1400px wide, but the height can be between 300px and 400px.
Colour scheme: change the colours of your site.
Menus: by default, the navigation menu displays all your pages. You can override this with a custom menu. This option is also available from the dashboard: Navigate to Appearance > Menus. More about WordPress menus from CampusPress.
Widgets: widgets are small pieces of content that can be enabled on your site, usually appearing in the right-hand sidebar or footer area. You can add, edit or replace widgets. This option is also available from the dashboard: Appearance > Widgets. More about WordPress widgets on wpbeginner.com.
Additional logos
You have the option to add one or more additional logos, eg funders or partners, by adding a widget to your sidebar or footer.
The following video shows you how to add a clickable image-link (eg a logo that links to the relevant organisation’s website) to your site’s sidebar. These steps can also be followed to add one to your footer instead:
Request a different theme
All sites created on blogs.bristol.ac.uk use the University of Bristol theme by default.
If the blog/site represents a multi-institution project/centre which has its own identity, where University of Bristol branding would not be appropriate, email web-editor@bristol.ac.uk to ask about custom themes.
Please include the reason why your site would need a different theme. If approved, you will be able to choose from a range of themes to suit your needs.
Switch to the University of Bristol theme
If you have a blog using a different theme and want to switch to the University of Bristol theme, on the dashboard navigate to Appearance > Customise in the left-hand navigation menu. Find the ‘UOB Blog Theme’ where you can ‘Live Preview’ how it will look before selecting ‘Activate’.
As a Blog Editor you will benefit from creating new categories and tags for your blog so you can curate content that you and fellow blog contributors create.
Categories vs. Tags
Categories and tags are both used to help readers find posts and navigate through information on your blog site. Categories offer a broader overview of the topics you blog about, similar to the chapters of a book.
Tags, on the other hand, are similar to an index of a book: they are much more granular and divide a blog topic into as many smaller subtopics as necessary and relevant.
Tags are always displayed on your blog posts as a tag cloud in your sidebar. When your readers click on a tag name, they are taken to a page that lists all posts that use that tag. As a general rule, the larger the size of the word in the tag cloud, the more posts have been tagged with that name.
You can upload and edit your images either from within posts or via the media library. Full instructions on editing your image settings can be found via the Edublogs support guides.
Videos
The maximum file size you can upload is 50MB. If you have videos larger than this and cannot make them any smaller, you can ask marketing-team@bristol.ac.uk about hosting videos on the central YouTube channel.