Get analytics for your blog

Analytics are a useful source of information about how your blog is performing, who it is reaching, and how popular it is. Setting objectives for your blog based on web traffic analytics is an effective way of improving your site’s reach and uptake.

The University uses Google Analytics to provide web analytics on content within T4 Site Manager and CampusPress.

Get access to analytics.

Things to think about before launching your blog

Developing a successful blog that users find useful, interesting and want to return to requires planning and sustained commitment. Before you create a blog it is important to ask yourself a few key questions, so that you can get the most out of the effort you’ll be putting into creating and maintaining it. This guide covers some of these questions to help get you started.

What is the purpose of your blog?

It is important to consider your motivation for creating a blog and to have an understanding of what you want to achieve by sharing your ideas. Starting a blog just because you’ve seen another department or academic in the University do it isn’t necessarily a strong enough reason by itself as it won’t provide you with the focus your articles need in order to attract a robust audience (rather than just occasional, casual readers).

Examples of a good purpose might be:

  • Sharing observations of my current research
  • Providing an insight into life/studying at our department
  • Starting in-depth conversations around global topics related to my research interests

With a clearly defined purpose you can start to plan and shape what sort of articles you intend to write.

Who is your audience?

It is essential to be clear on who you want to communicate with and think about why they would want to engage with your content. You are passionate about the things that you want to share, but who else shares the same passion? Research community? Alumni? Prospective students? Understanding this will guide your decision making around the types of articles that you write, and your style of writing, helping you to create posts that people will want to read and share with others.

If you try and cater for everybody, you will struggle to attract anybody.

How often will you create new content?

Developing an editorial calendar and giving yourself deadlines will help you to create good content in a timely manner. Blogs that are inactive for long periods of time or that only publish content sporadically will not be as effective as ones that can be relied upon to produce regular well curated articles. Frequency and volume are by no means a mark of quality, but if you can’t commit to publishing something on a regular basis, you may want to consider whether this is the right platform for your communications.

How will you promote your blog content?

People won’t read your blog if they don’t know about it. Make sure you advertise your blog wherever possible: add a link to your website, on any relevant print or online publicity you produce, and encourage your colleagues to include it on their email signatures. Most importantly, make sure to actively advertise your articles on social media after you’ve published them.

You can also encourage users to subscribe to your blog by using the ‘Subscribe by email’ widget.

What else should I think about?

There is a wealth of online information for you once you are in a position to grow and develop a successful blog.

Finally, make sure you’re following good principles of web writing when drafting your articles.

Giving someone access to edit your site

Giving access to University staff and postgraduate research students

To add a user to your blog, they first need to set up their own account on the Bristol Blogs Network. Give them these instructions:

  1. Firstly, please read our Terms and Conditions for using Bristol Blogs.
  2. Go to https://blogs.bristol.ac.uk/wp-login.php
  3. Click on ‘University of Bristol login’
  4. Log in with your UoB username and password (if you are already signed in to your UoB account on another browser tab, eg signed in to Outlook, it may sign you in automatically)
  5. This auto-creates your user account.

Once they are registered on the Bristol Blogs Network, the blog’s Administrator will be able to grant them their required access level. To do this:

  1. On your site’s dashboard, navigate to Users > Add New. Make sure you are in your own site’s dashboard
  2. Under ‘Add Existing User’, start typing the email address or username of the user you’d like to add. Email address may be their full.name@bristol.ac.uk email address or their shorter id email address, for example ab1234@bristol.ac.uk
  3. Select the relevant role for the access level they require
  4. Click the ‘Add Existing User’ button
  5. Your new user will be automatically added to your blog. To check this, you can navigate to ‘Users > All Users’ and the new user should be listed alongside their role. The new user should also see your blog listed under ‘My Sites’ when they have logged in.

Giving access to users from another organisation

As a blog owner you may want to add users from another organisation so that they can create new posts, as a regular guest contributor, for example, or because your project is multi-institutional.

To do this, you will need to contact web-editor@bristol.ac.uk with:

  • the user’s email address
  • a username of the user’s choosing
  • user’s first name and second name
  • user role (otherwise the user is added as a subscriber)
  • blog URL

Once the user has been added to the Bristol Blogs network, they will receive an email with instructions to log in to their allocated blog site.

Giving access to undergraduate and postgraduate taught students

Undergraduate and postgraduate taught students are unable to create their own blog. However, if you are a blog owner you can give an undergraduate or postgraduate taught student access to edit your blog. To do this, follow the instructions above for giving access to users from another organisation.

Understanding the dashboard settings

The Dashboard (wp-admin) is the first screen you see when you log into the administration area of your blog.

You can get to this dashboard by adding /wp-admin to the end of your site’s url (e.g.: example.blogs.bristol.ac.uk/wp-admin)

The main idea of the dashboard is to give you a place where you can get an at-a-glance overview of what’s happening with your blog.

The features available to you in the Dashboard will depend on your user role. View a summary of these differences in EduBlogs ‘User Role Overview’.

Key features of the Dashboard

This article offers a comprehensive overview of all the features available on your dashboard. Please note that we do not have the My Class or Upgrade and +Pro Account functionality enabled for the Bristol Blogs network.

Settings overview

The Settings menu inside your blog dashboard is where you configure how your blog works.

Understanding user roles

When you set up a blog you have the ability to assign and control what other users can do in the blog depending on the tasks you want each user to be responsible for.

The five roles you can assign users on a blog are, in decreasing level of responsibility:

  • Administrator
    Has complete power over posts, pages, plugins, comments, choice of theme, settings, assigning user roles, and deleting the site.
  • Editor
    Able to publish and manage posts/pages (including those written by other users), upload files and moderate comments.
  • Author
    Can write and publish their own posts, and upload files.
  • Contributor
    Can write posts but not publish them; these are instead submitted for review to an administrator or editor.
  • Subscriber
    Can read and write comments.

Administrators can give access to others to edit the site.

Appearance and themes

On this page

Overview of themes

Themes control the design of your site, including the overall colours, font, and layout.

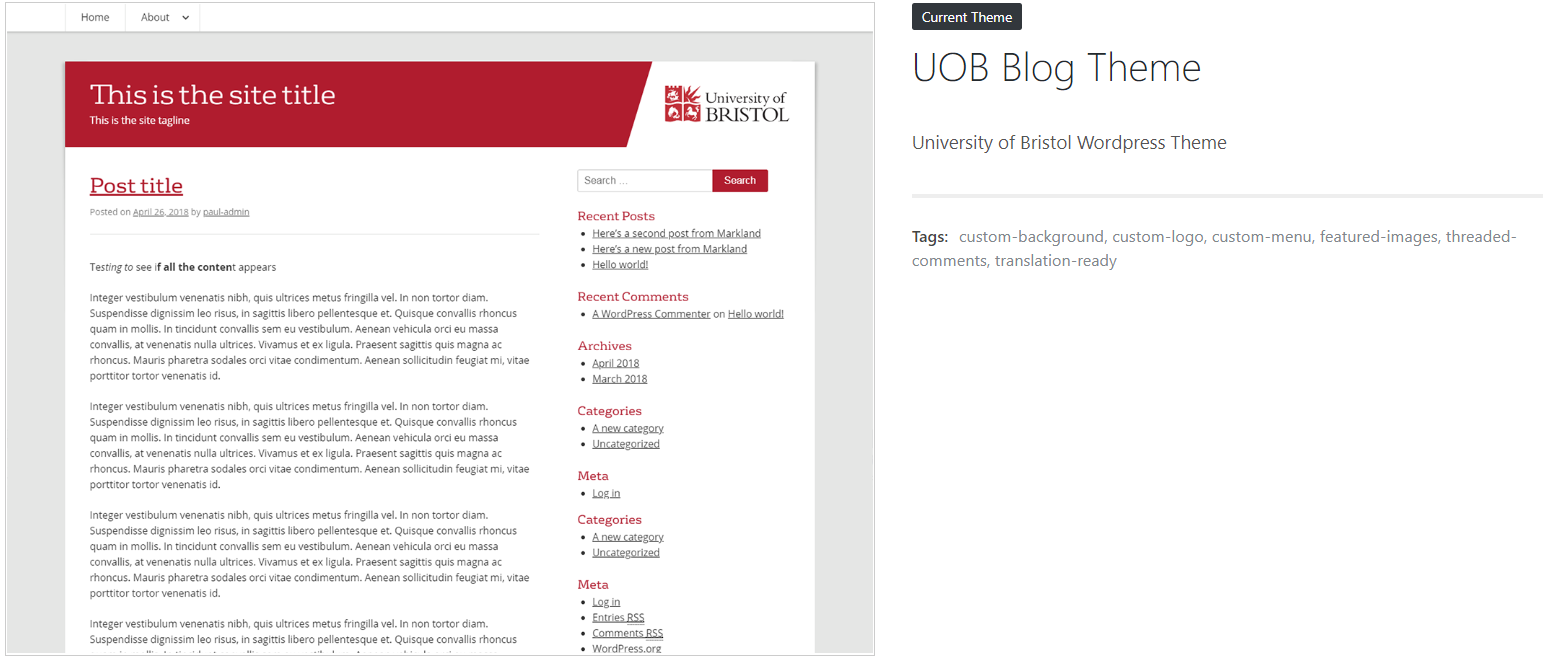
On the University of Bristol Blogs network, the default theme is the ‘UOB Blog Theme’.

Customise the University of Bristol theme

You can customise the ‘UOB Blog Theme’ in a number of ways.

To do this, log into your site and from the Dashboard:

  1. Navigate to Appearance > Customise in the left-hand navigation menu.
  2. Site identity: change the site title and tagline.
  3. Static front page: choose whether your homepage displays a listing of your latest blog posts, or select a static page of your choosing.
  4. Header image: the header image sits as a banner across the top of your site, appearing on every page. You can add a new image or replace an existing image. Choose a high-resolution, landscape-oriented image that relates to the subject matter of your site. The image size must to be 1400px wide, but the height can be between 300px and 400px.
  5. Colour scheme: change the colours of your site.
  6. Menus: by default, the navigation menu displays all your pages. You can override this with a custom menu. This option is also available from the dashboard: Navigate to Appearance > Menus. More about WordPress menus from CampusPress.
  7. Widgets: widgets are small pieces of content that can be enabled on your site, usually appearing in the right-hand sidebar or footer area. You can add, edit or replace widgets. This option is also available from the dashboard: Appearance > Widgets. More about WordPress widgets on wpbeginner.com.

Additional logos

You have the option to add one or more additional logos, eg funders or partners, by adding a widget to your sidebar or footer.

The following video shows you how to add a clickable image-link (eg a logo that links to the relevant organisation’s website) to your site’s sidebar. These steps can also be followed to add one to your footer instead:

Request a different theme

All sites created on blogs.bristol.ac.uk use the University of Bristol theme by default.

If the blog/site represents a multi-institution project/centre which has its own identity, where University of Bristol branding would not be appropriate, email web-editor@bristol.ac.uk to ask about custom themes.

Please include the reason why your site would need a different theme. If approved, you will be able to choose from a range of themes to suit your needs.

Switch to the University of Bristol theme

If you have a blog using a different theme and want to switch to the University of Bristol theme, on the dashboard navigate to Appearance > Customise in the left-hand navigation menu. Find the ‘UOB Blog Theme’ where you can ‘Live Preview’ how it will look before selecting ‘Activate’.

Plugins

Plugins work closely with your theme to enhance your site. Find out more about plugins.

Plugins

Plugins are small applications that you can activate to enhance the functionality of your WordPress site.

This includes anything from adding content elements such as an events calendar, to adding tools which help you to improve the way your site functions, eg search engine optimisation.

CampusPress, the University’s WordPress service provider, manage an approved list of plugins on our behalf by keeping them up to date and ensuring each plugin meets a certain level of security, accessibility and usability.

You can find an available list of plugins via your dashboard navigation menu, under ‘Plugins’.

You can activate (or deactivate) any plugin in the list. Find out more about a particular plugin by following the plugin’s ‘Documentation’ link.

For some plugins (eg Jetpack) you will need to set up a separate (non-UoB) account via WordPress.com for them to work.

Media Library

All media content, such as images, video, audio and documents, that you upload to post/pages will be listed in your media library.

You can manage all existing media files, or upload new ones, directly to your blog via the media library.

The maximum file size you can upload is 50MB.

Learn more about managing files in your media library, including:

  • About your media library
  • Different view settings
  • Storage and space
  • How to edit your image and image settings
  • How to upload and/or delete media.

Images

You can upload and edit your images either from within posts or via the media library. Full instructions on editing your image settings can be found via the Edublogs support guides.

Videos

The maximum file size you can upload is 50MB. If you have videos larger than this and cannot make them any smaller, you can ask marketing-team@bristol.ac.uk about hosting videos on the central YouTube channel.